Indoor Cycling instructors know how to plan, instruct and evaluate a safe and effective group indoor cycling session. They focus on appropriate health and safety considerations in group indoor cycling courses. They know all about Indoor Cycling approaches and techniques, how to set up a class and more. No matter which indoor cycling workout you run at your studio, it’s usually ideal for class participants to ride as a group, in the same “zone” with the instructor.
With Spivi®, that togetherness can be achieved visually. 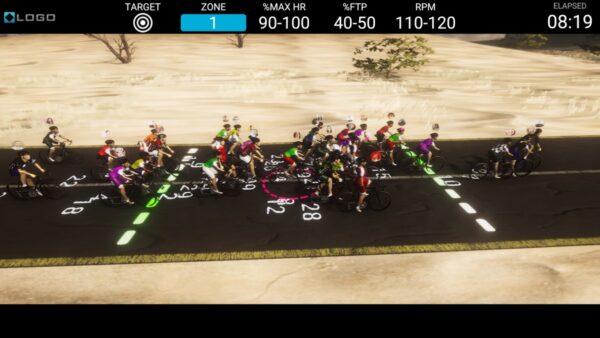
What is the Riding Zone?
The Riding Zone is a virtual area defined by two green bars that cross the virtual road in two different places, one represents the front side of the area and the other one represents the back side of it. There are three purposes for the Riding Zone:
- To provide the instructor with an easy tool to visually reflect the training program goals.
- To give the instructor a way to ensure people are riding according to the training program guidance.
- To let class participants know where they are in relation to the goals.
During a class, while the group rides and keeps moving forward on the road, the Riding Zone area is accompanying the group so that everybody knows exactly how they’re doing. The Riding Zone continues to accompany the group as long as the class progresses.
How does it work?
When in Live Instructor Mode (without using a predefined training program), the Riding Zone moves forward in real time according to the instructor’s progress. If the instructor rides at 85 RPM, the Riding Zone moves forward at 85 RPM. The instructor’s avatar will always appear at the center of the Riding Zone in this mode. When the instructor leaves his bike, the Riding Zone moves forward according to the class average.

When in Virtual Instructor Mode or when in Live Instructor Mode with a predefined workout program, the Riding Zone moves forward based on the program goals. (If the program goal is 90 RPM, then the Riding Zone moves forward at 90 RPM.) 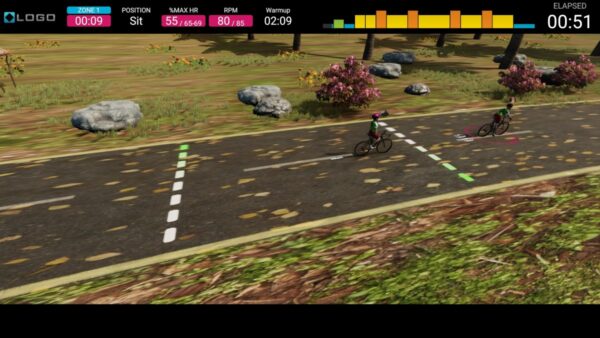
But, what does the Riding Zone look like in “Power programs” (based on power and cadence) and “Cadence programs” (based on cadence and heart rate)?
Well, when used with Power (Watt) sensor-equipped bikes such as Freemotion S11, Star-Trac Spinner Blade ION, Schwinn AC Performance, Bodybike, Wattbike and others, the Riding Zone reflects the real energy the instructor produces in real time.
When used with Cadence (RPM) sensors, the Riding Zone reflects the RPM of the instructor, showing the RPM goals the group should follow.
In both program types, if a rider crosses the front bar of the Riding Zone, his/her circle will turn from green to red, when used in combination with the performance dashboard view. In a “Cadence program,” it means the rider should add more resistance in order to stay with the group. In a “Power program” it means the rider is not riding according to the instructions.
When people get behind the back bar in a “Power program,” they should put in more effort and keep up with the group. Their circle will turn from green to gray when the performance dashboard view is active. In a “Cadence program,” it means they should release some resistance and increase RPM.
Comments
0 comments
Article is closed for comments.