Spivi's Payment Processing Services allows you to take payments from your members when they book a class.
Prerequisites
- Before you continue, you must first create your classes using the Spivi Scheduler.
- You must be subscribed to Spivi's Payment Processing Services.
- From the My Studio page, click on Services & Pricing.
- Click Subscribe
- Click Activate
Creating a Pricing Category
 Click on the Add Category button to get started. You will be prompted to create a new pricing category name. We suggest using a name such as Indoor Cycling Classes, or HIIT Classes.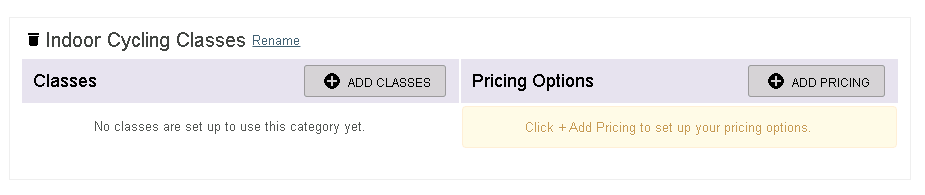
Setting up your Pricing Options
 Once you have added a pricing category, click on the Add Pricing button to set up your pricing options.
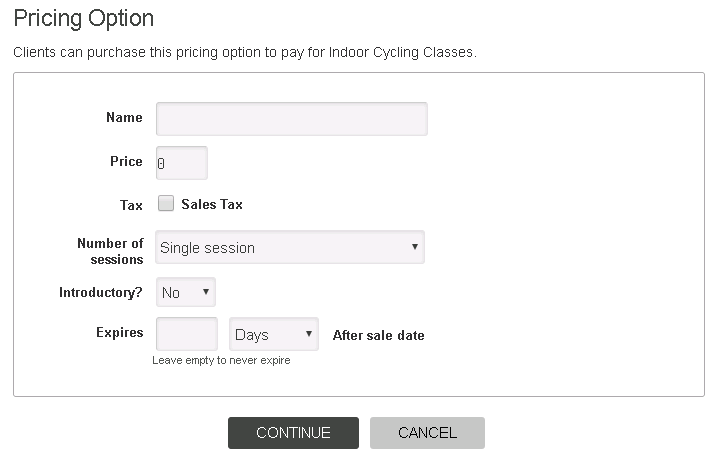
The following properties can be configured:
- Name: Choose an appropriate name for your pricing option: Single Class, 10 Classes, Monthly Unlimited, etc.
- Price: Sets a specific price amount
- Tax: Enabling this will add the Sales tax to the price. Be sure to set your Sales Tax in the Merchant Settings and Advanced Options page.
- Number of sessions: Choose the amount of sessions from the available categories: Single session, Multiple Sessions, or Unlimited Sessions.
- Introductory: If enabled, this pricing option will only be applicable once. For example: "$5 Off Your First Ride!"
- Expiration: Select an expiration date. Leave this field empty to never expire.
Setting up your Classes
 Once you have created your pricing options, click on the Add Classes button to add specific classes to your pricing category. Add all applicable classes to your Pricing Category.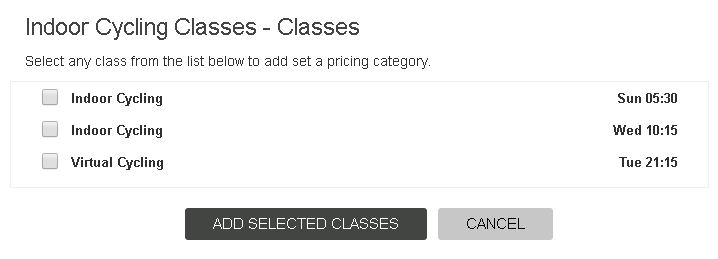
You can create multiple Pricing Categories, as seen in the example below:

Setting up your Subscriptions
Please note that subscriptions will only work if you are using Stripe. 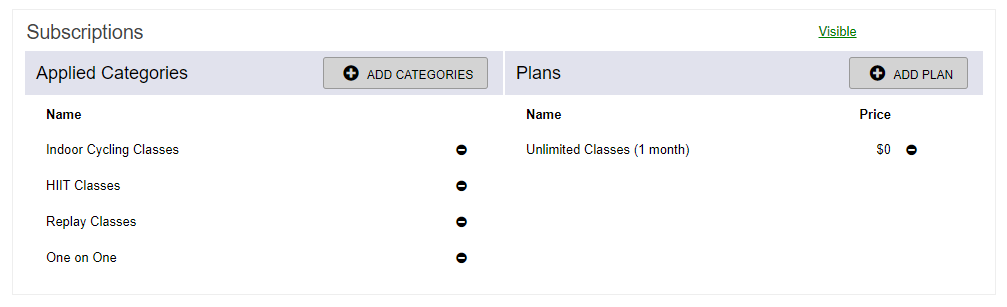
 Once you have setup all of your categories, click on the Add Categories button to add specific categories to your subscription plans. Add all applicable categories.
 Next, click on the Add Plan button to add your subscription plans. The following properties can be configured:
- Name: Choose an appropriate name for your pricing option: Single Class, 10 Classes, Monthly Unlimited, etc.
- Monthly Fee: Sets a specific price amount that will be automatically billed each month.
- Tax: Enabling this will add the Sales tax to the price. Be sure to set your Sales Tax in the Merchant Settings and Advanced Options page.
- Number of sessions: Choose the amount of sessions from the available categories: Single session, Multiple Sessions, or Unlimited Sessions.
USAGE:
Once a member registers for a live class in the studio or online, their credit will automatically be deducted. If a member cancels their registration during the allotted cancelation window, their credit will be automatically replenished. Members who participate in a Spivi Replay class using Spivi Home will have their credit automatically deducted, only if they've participated in the Spivi Replay workout for over 15 minutes. Subscription plans will automatically charge your members each month. If the payment is successful, then their plan will be renewed. If the payment is declined, the member's plan will automatically be removed from their account. In order to cancel a running subscription on a member's Stripe account, you must log into stripe.com and terminate the subscription from Stripe's platform. Once a subscription plan has been created, it cannot be edited! In order to edit an existing subscription plan, you must delete the plan, and create a new one.
Comments
0 comments
Article is closed for comments.